Monday, September 26, 2011

Front Door, Clerestory, and stairwell frame installed

Today was the big day - we unwrapped and installed the front door as well as assembling the stairwell window frame and installing it.  The framers also installed the clerestory windows and we pulled one piece of glazing so Armin could see it and report findings to the plant in Germany.  Basically one part of a seal on a window appeared to have separated from the glazing slightly and there was slight damage to the vinyl on a couple of the window units.

 Armin came along to advise us on the installation for the large units to include the doors which had different hinges than we had experienced before.  Armin spent more time than we expected getting very involved in the work and ensuring things fit and operated properly.    It was a long day but well worth the final results as you can see in the picture.  The door is probably unique in the US - and it weighs about 400 pounds!  Fortunately we were able to remove the door from the frame before installing it - but the glass in the transom and sidelight remained in the frame.  The opening for the door was a bit too close on tolerance so we had to do a bit of concrete grinding - Kevin did the grinding and I simply operated the vacuum to avoid the dust from getting on everything in the house.

The stairwell window is two pieces joined in the middle with a 1/4" thick piece of steel bolted in between the two for strength.  We haven't installed any glazing in that so I don't have pictures.  We also assembled part of the 3-piece family room window(s) - the middle is a tilt-and-turn window while the two outer panes are fixed glazing.

The clearstory windows are similar to the large window in that the middle window opens - it is a hopper (casement turned on its side to open from the top only) that is operated by a 16' long removable crank arm.  The opening portion of all the windows is screened so we can take advantage of the nice weather in the shoulder seasons (including the stack-effect where the rising heat goes out the clerestory and is drawn in through open windows elsewhere in the house).
These are the before and after pictures of the front entry - a pretty dramatic change.

A distance view of the front entry before the door goes in - the windows on the ground level are in but the clerestory are not yet in.

Close up of the font entry - living room to the left of the door, formal dining room to the right.


Now there's a great looking front door. If suits the house pefectly.  

a little wider view of the front entry (living room left, formal dining room right) .  The clerestory frames are installed at this point but difficult to see in this picture.  

Thursday, September 22, 2011

Window Installation - and initial pictures of the installed units

Today we began the install of the windows in earnest.  The framers finished installing the demonstration window in the dining room while Kevin, Nick (hired muscle) and I began removing the glazing from the frames so all the framers had to do was set the frames and secure them (leveling and plumbing them in the openings).

 After the first couple we figured out the secret to making the glazing removal go more quickly but then we hit the larger "egress" openings. Those windows use a different hardware that is stronger to carry the heavier weight of the window.  We didn't have the installation pamphlet since I forgot it on the kitchen table when I left home this morning.  A call to Armin didn't really help since we were not sure what model the hardware is.  Once the pamplet arrived it proved little good since none of us could translate German and the pictures were not that clear.

We did manage to figure out the process on removing the first window and then moved to the next couple which got progressively easier.  It still wasn't entirely obvious what combination of handle position and window manipulations was exactly the right one but we got through it.

We got well ahead of the framers with removing the glass and decided to start putting the glazing back into the windows already mounted. One "secret" was to use latex/silicone caulking to hold the plastic shims in place while setting the glazed units back into the frames.  Putting the removable vinyl strips back in wasn't too difficult but you had to be willing to use some pressure to seat it well.

Reinstalling the "heavy window" sashes into the frames was more complicated than we thought but after the third unit we figured out the right handle position and managed not to spend too long having Kevin and Nick hoist the heavy window while I fumbled with the hinges.

It is pretty amazing how much the look of the house changes once you get the windows in - they add color and texture that was otherwise lacking.


Here's the formal living room window installed with the glazing back in.  We haven't removed the white protective tape yet but it does provide a good idea of the unique structure of the windows.  

Here's the upstairs front bedroom with most of the protective film removed - you can see the color of the windows well here.  

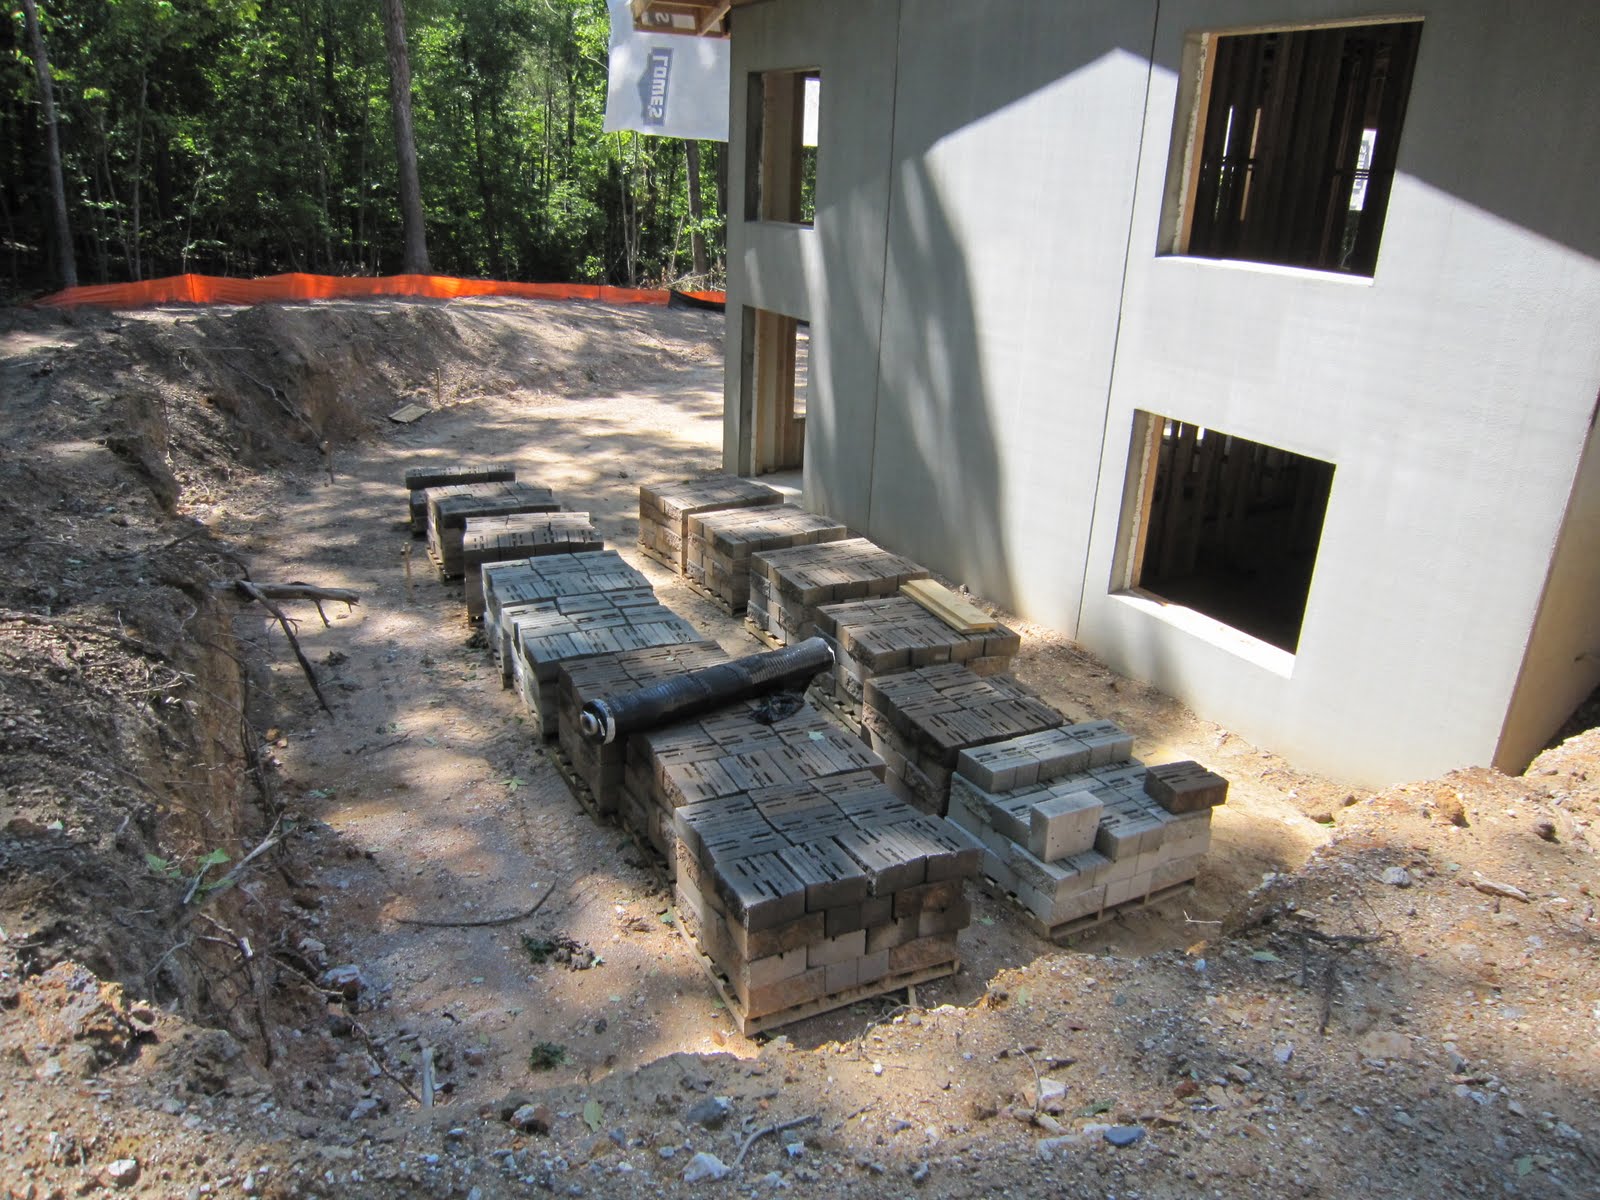
The front of the house showing the installed living room and dining room windows.

This is the banana that Jesse forgot to take with him after his visit today (around lunch time).  He refused the $1M ransom I demanded for ti's safe return - but he got it back safe and sound anyway!
Today we finished installing the frames and glazing on all the main floor windows to the East of the entry hall as well as 3 windows and a door in the basement (the window that is the door).  Monday Armin will return and assist us with installing the larger windows (metal supports that have to be installed to join two separate pieces of the window).  We have the clerestory windows, French door, entry door, back patio door and two rather large windows (6 x 16' in 3 pieces and the 6 x 11 1/2 in two pieces) that will require some finesse.  The French door has a transom that must be attached using some blind screws and cut-to-length bolts.

All in all a good day - some challenges at the start of the day as we figured out how best to remove the glazing and operable sections of the windows.  I think I can say we all went home tired and ready for a good nights sleep.  Tomorrow will be a day of rest for the window install which is probably best since we are expecting copious amounts of rain in the next 24 hours.  We had to call Armin a number of times today for advice on sash removal, hinge mechanisms, and general information on how to install these windows successfully.  He was a great help and will return to the site on Monday to help us with the "big" windows, doors and multi-piece units that aren't like the others we have already "mastered."

One big lesson we all learned from this was not to plan on unloading two house-loads of windows on the same day as you do the initial training session.  It may have been easier had the truck not had to make a 4 1/2 hour drive to the first site and then home again after the training session.  The other recommendation would be to have the trainers install one window start to finish and then oversee the framers as they installed their first window; that may have sped up the first few installations.  We haven't yet taped/foamed/glued the bottom inside and outside of he windows but plan to do that in an assembly line fashion so we get the system down and do it quickly and when the humidity isn't so high you have condensation pools forming on the concrete slab in the basement.


Wednesday, September 21, 2011

Windows and Doors have arrived!

Today the windows and doors arrived from Germany via Asheville NC which happened due to the transportation company refusing to unpack the crate and Eurostar Fenestration having to scramble to get a team to do that and store the windows until shipping them here.  The truck left Ashville early this morning and they dropped off the windows for another job in East Raleigh before getting to our place at about 2:45 or so and the team unloaded all placing them in the appropriate rooms.  These are not your garden variety windows and door so it took anywhere from two people to 6 people to lift them and carry them into the house. The heaviest were the French Door unit, the entry door, and one of the parts of the stairwell window.

We got the Nussbaum (walnut) foil on the windows but the front door is a deep red (brown-red is the translation) - it's a phenomenal color. We didn't unpack the door from the cardboard so we haven't actually seen the entire door yet (one more surprise waiting to be unwrapped).  The window frames add color to an previously concrete and pine color palate - and it's great to see!

The much anticipated window shipment coming down the driveway. 
here's how they made the trip from East Raleigh - they repacked the truck after offloading the other set of windows so nothing shifted during the 45 minute drive.

This is one massive front door - six people had to contribute to lifting it - that rental truck had a power liftgate but every time the "down" function was activated the folks holding the window felt like the floor was falling out from under them. Only one time was there a near catastrophe when one lost his balance and the other nearly went with him and the window onto the concrete porch.

In the previous picture and this one you can see a hint of the brown/red color we chose.  There probably are not too many front doors like this one in the US.  It's all aluminum with a sidelight.  Once we install the door it won't be used for normal construction traffic - we'll have everyone enter and exit the house via the laundry room door which is a standard US door.  We don't want to risk damaging the door or having someone unfamiliar with European mechanisms do something that damages it.

 Jeremy and Armin from Eurostar Fenestration ran a short installation tutorial to train the guys who will install all the windows.  I won't try to go through all the steps but basically you take out the glazing (first removing the sash for windows that open) and then put expanding foam tape on the top and sides.  You then set the frame into the rough opening, position it, drill into the concrete and screw it into place.  You then tape the bottom on both inside and out, gluing the tape to the concrete and foaming before you glue down the inside tape.  The expanding foam tape is designed to work for a 1/2" opening so positioning the window exactly in the correct location is critical.

  We did get some additional information regarding the installation of the doors and windows that are different - for instance the low-threshold doors have a different hinge system than the hidden hinges on the majority of the windows. There is also a 3-piece screw system that is used to connect the transom to the French Door that will require some assistance.


Sunday, September 18, 2011

We have a well - and the garage roof is up (almost)

They finished drilling the well on Friday - this time they hit a significant number of fractures on the way to the 545 foot depth.  On Thursday when they finished they were at about 420 feet and we had about 1 gallon flow rate.  Anyone who has drilled a well knows that this is all an estimate because you try to capture all the water escaping from the well in a gallon bucket and time how long it takes to fill.  Friday morning they blew the well out - it had water up to about 70' from the surface which provides some significant storage (420-70=350 feet of storage at 1 1/2 gallons per foot of well depth).  They drilled down to a total depth of 545 feet and gained another 1/2 gallon or so of flow rate.  One thing they were very upbeat about was the number of fractures they encountered on the way down as well as the changing colors of the well casting coming up.  We ranged from brown, to blue, green and the "dreaded" purple but the changes were fairly frequent which is a good sign that we're crossing different levels.

   They cemented in the casing (this time only 47 feet of casing) and the inspector was on site at 12:00 so the well is now official.

The framing crew finished up Thursday by using up the Zip roof they had but not quite able to finish the garage roof.  They did zip-tape and roll all the seams and as they were finishing that the skies opened up again with a downpour of rain.

Friday was HVAC crew working to finish some of the work including ERV hard-pipe ducting and finishing routing the chases from the mechanical room.  Kevin and I occupied ourselves by drilling holes in the concrete walls for the dryer vent (4") and the make-up air vent for the range hood (6").  We didn't get to drill the two ERV (8") holes because we ran out of time.  Interestingly enough we managed to find the rebar on both of the holes we did drill so we had to switch to a hammer-drill and sawz-all to cut the remaining concrete and rebar out.  We left the sawz-all work to the HVAC guys.

Saturday we hit the Reuse Warehouse and scored some tile for the hall bathrooms - we got all the tile for the showers in both bathrooms for under $2 per square foot and that included some  12 x 24 linen style tiles that are really cool looking.  We managed to get 14 x 14 tiles (81 of them) and enough matching bullnose for the other shower.  We are now planning out the master bathroom but will not make the purchase for that until we have the bathtub deck built.  On that subject, the windows and doors from Germany should arrive on Wednesday afternoon and we'll start installing them that afternoon.  We're all excited to see these doors and windows as well as to witness their installation. We're using the German system for mounting which entails expanding foam tape (top and sides), screws into the concrete, and two separate tape seals on the bottom.  These doors and windows will be the next big transformation of the house and will enable us to start the sealing in earnest.


Wednesday, September 14, 2011

And then the Garage went up

Today the framing crew got to work and quickly changed the look of the house.  They got the sill plate down and by lunchtime they had the walls up on the garage.  Kevin had to make a run to pick up the 20' long LVLs that make up the header and then we made the second trip of the day (first was on the way to the site) to pick up the remaining lumber.

  Burgers were a hit with the crew - and they had their post-lunch siesta before getting everything ready to set the trusses up and make it a complete garage.  By the time I left for the day they were finishing the roof structure by fabricating the supports where the garage roof (3:12 pitch) meets the house roof (4:14 pitch).

This really does change the look of the house for the better.  Once the well is drilled the framers will finish up the deck and the look will be all but complete (hardi siding, paint, roofing).


The framing crew raising the second garage wall.  That's wood on the floor to protect the concrete that was just poured yesterday.

And it's UP. 
Nailing the wall to the sill plate.

Setting the braces to hold walls parallel and vertical while building remaining part of garage.

This is the post-lunch Siesta - Roy was playing with his new Blackberry and the rest were trying to sleep.  Loud music wasn't conducive to sleeping!


Break time - most of the trusses are up on the walls buy laying down at this point.  Once they started setting the trusses it didn't take long to  get them all in (about 90 minutes including bracing and then building the intersection of the roofs with the complex angles)


Gustavo trying his hand at dowsing - he wasn't successful but sure did enjoy trying.

It's cheap entertainment at worst! 

Wait - did it really work for him?  No - but I showed them  that it worked with my eyes closed.  

Here's a view of the almost complete framing from the NorthWest corner

And the obligatory "driveway view"


Head on view from fairly close


Head-on view from North edge of the cleared area.

A close up from the North edge of the cleared area
I left at about 17:30 and the crew was still working - I expect the morning will reveal a garage with roofing and a gable end on it.  Just for info that door is 8' tall and 18' wide.  Hoping on Thursday we can report that at least one well has been drilled and we're moving on to the second geothermal (inferred is that the first has sufficient water for the house).

Tuesday, September 13, 2011

Garage slab, and a Dowser visits the site

Today the crew poured the slab for the garage and breezeway/porch. Another fine job by the folks from Covenant Concrete.  We had a bit of a burger-burn for lunch on site today which was a hit with all parties.  One amusing point in the days events was when the field mouse made a hasty exit from the house out the front door and across the wet concrete.  He met face-to-face with Clayton and decided retreating into the house was his best option.  We didn't get the benefit of natural footprints because this was still when the concrete was very fluid and hadn't been troweled to a finished state yet.

Clayton and crew working the first truck of concrete.  First truck showed up at about 7AM and Claytons crew had already been there for an hour or so doing final preparations (cleaning up where yours truly had moved the excess ABC off the ramp area)

View of the concrete from the East end.  

One more angle - again it amazes me the process for concrete as it moves from the very viscous stage on through the stage where the team power-trowels it and hand trowels the areas too small.  they cut the expansion joints in by hand and by this time, they were able to walk on the concrete (gently) without making any marks.  

The electricians pulled most of the runs they were able to today and will return once we're ready for things like the garage, deck, and kitchen.
The exciting news of the day was we contacted a dowser who offered to come to the site this afternoon.  He asked that we point out a moderately sized area to dowse which we did.  He also brought along some "toys" as he called them to see if any of us could get the feel.  He dowsed our new proposed location and found little indication of water other than near the pile of pulled stumps.  We moved up the hill a bit and he found a spot that had some potential.  At that point he handed me the two pieces of bent coathanger, coached me how to hold them and to my amazement, the rods turned outwards at almost the exact spot his did.    We spent a bit more time dowsing for a secondary spot and then moved on to a third spot which turned out to be so strong we moved it up the list to the number 1 spot.

 I'm not sure of the science behind this method but when you look at the NC State soils map and compare the location of the other wells in the development the prime spot fell in that same type of soil.  We even had the state inspector on site to ensure the wells were at the proper setback and she tried her hand at dowsing.  Much to her surprise there was a response at the same point the rest of us got some response.  To fine-tune the results we did some slower passes and the professional actually was able to determine that the water flowed in a South to North direction and could sense the width of the source.  We hope to put this to the test later this week once the State inspector gets us the permit - and we're sure hoping the strength of the dowsing reaction at the prime spot is another success for dowsing fans!

Tomorrow the garage walls and roof go up - the trusses, roof sheathing and wall materials were all delivered today   we're ready to start first thing in the morning.  After that we'll have the framers move to the punch-list inside the house (pocket doors, chase for HVAC, and some strongbacks on the ceiling for attaching the sheetrock/OSB.


The finished product - trusses and Zip roofing are at the ready for use - there's a 2" drop from the house end of the garage to the driveway end and the slope increases for the access ramp.  This was done in large part to accommodate the flow of water which currently is through the depression in the ABC just short of the concrete ramp.

Sunday, September 11, 2011

We're in week 15 since clearing. Lots to report.

This week marked the 14th week since we began clearing on June 2nd.  Monday marked that last day we had the bobcat we rented to build the retaining wall and the remnants of Tropical Storm Lee came in about mid-day and then continued through Tuesday (see the previous post).  While the house wasn't quite dried-in, we took very little water.  On Tuesday morning we took advantage of the light rain to put up some house-wrap over the open gable end and clean up what little water did infiltrate.  We also found that the raccoon had returned to his comfortable home on Monday - but by Wednesday he appeared to have had enough of the noise and commotion that he left.  We moved the burlap out and now there's no food source, water, or comfy "beds" for him to sleep in so hopefully he's found another place to live.

  Tuesday the only folks who worked were the electricians - they needed the work light we had just to see in the house because of the dark wet day.  Overnight there was about 4" of rain that fell again and the backfill area settled some more - which is all good since that means less settling in the future.

The framing crew returned to work on Wednesday to put in the deck roof (and support columns) as well as the gable end wall.  Unfortunately we weren't able to get sufficient quantity of the Zip Roofing system locally so they could not complete dry in the roof on that end but the majority is done.  They also were able to finish the sheathing on the clerestory and do some of the punch-list items inside the house (niche's over the panty closets, niche at the end of the hall, bathroom "bump-out" to account for the plumbing being 3" off the 12" rough-in required, removal of the bathroom knee-wall due to a new design whereby a cabinet goes in that space instead).  We also moved the closet from the "office" to the workout room due to the larger size and ability to place a bed more readily in the bedroom created by that move (resale value item).

 Wednesday also saw the concrete crew return to prep the garage for the concrete footing inspection and pour.  We also made a slight modification to the front area by adding a walkway that extends from the breezeway past the front door. It makes a good flow and since it's 5' wide we'll be able to display items there without fear of water damage (dripline from the overhang is beyond the concrete by a slight bit).    The prep took 3 full loads of ABC (crush and run) plus about 3/4 of another.  The crew compacted it with a plate tamper, set the forms, and doweled the rebar into the concrete walls of the house to prevent any sinking of the "porch." in the future.

  Friday was another "quiet" day on the site - only the electricians and your's truly were on site.  I was basically cleaning up and moving the remaining ABC from the front of the garage pad area out in the run-up so it was ready for the Monday inspection and the pour early on Tuesday.

We also received a call from the state inspection folks regarding the location of the geothermal well.  They will visit the site on Tuesday to ensure we've got the appropriate set-back from the house, the water well (proposed location) and the like.  Part of this appears to be that the contractor we plan to have drill the new wells has a Virginia business address so they have to be "sure."

Our final activity this week was a visit by the engineering firm to ensure the footings and doweling planned for the porch/breezeway will be sufficient to prevent settling in the future.

Driveway view as of the end of the day on Thursday

Garage footings in, final adjustments being made to rebar, leveling, and marking for the pour. And yes, that is "Patrona" as the framers call the lady of the house walking by on her clean-up run.

 View of the house from the Northwest corner - note the clerestory is "almost finished" and the deck roof is there.


Straight-on view of the deck area.  The deck will sit on the 'lugs' on the side of the house - decking will be 3/4" below the opening of the french door.  That middle post will be gone and a tie-rod system will pull the two LVLs in and be suspended from the peak of the deck.  Initially this will be an open deck but future plans will be to screen it in as far out as the posts - there will remain an open walkway along the West side of the deck that won't be under screen.

The prepared footing for the garage - rebar along the house but not necessary for the floor due to the fiber in the concrete.

The breezeway is marked off the the orange line, and you can see the porch runs to the front door.  This also shows the drip-line outside the porch.  One note is there will be gutters that will catch the water so there really won't be a "drip" anyway.


This is the beefed up section of concrete where the breezeway meets the deck.

Looking from East to West - Front door is on the left, porch runs into breezeway and will be poured at the same time as the garage.


This shows a view of the niche above the pantry - there's one on the other side as well.  


Yep, another picture of the beams running down the hallway. This week with the electricians working, we found that the concept was great but getting the electrics installed and having the slats is tougher than initially thought.  We won't wait for our site-milled hickory since we need to get this done soon.  We have the concept and now have to execute it.

Tuesday, September 6, 2011

Yep - it's been a week but things have happened

Sorry followers, it's been a busy week and my mind hasn't been into blogging when I get home from the site every day!  This past week we had the HVAC guys in working on the rough-in for the Geothermal system, the framers worked on the deck (finally) and we had the masons put the garage wall foundations in.  With the help of several great friends (and a rented track loader) we built a large portion of our retaining wall.  Today we had torrential downpours and tornado warnings due to Lee's remnants which turned the site into a veritable river.  The electricians slogged through the rain and worked today finishing the rough-in for the basement and started the main floor.  Still have some work to do on framing that will prevent a fair amount of work but the framing crew should be on site tomorrow to work that.

 It was a good sight to see the water all flowing across in front of the garage - about 30' from the house, into the silt fence along the West side of the site, and down into the "intermittent creek" which today really looked like "River Forks" which is the name of the nearby road.


HVAC Ducts at the ready to be installed

More ducting - this duct makes up the hard runs that go along the East/West runs supplying the rooms on the either side.

Here's the flexiduct at the ready

More HVAC stuff waiting to be installed.  Most of this was installed  by Friday.
The masons working on the footer walls for the garage on Thursday - 3 courses of block on top of the poured footings and then they parged it so it looks very much like the finish on the house.  We'll paint the exposed part with the same elastomeric paint we use on the house.
The long awaited deck roof in process as of Saturday - there are concrete lugs on the house that will hold the ledger board for the deck.  A steel rod/turnbuckle/plate assembly will tie the two 6x6 posts together for the flying roof.


This is some of the material for the wall - a total of 18 pallets of block with 2 additional partial pallets of cap blocks.  Each pallet holds 40 blocks weighing about 65 pounds each.  This was taken on Sunday last week.

This is the wall at the end of my work day on Wednesday.  I originally built it up with a square corner but once we reached about 4 blocks high the "bond" (where the blocks overlap) had changed enough that there was a gap forming and I didn't want to cut too many blocks.  I tore it down and rebuilt it with this 6' radius curve.  At this point all work was done by hand.


This is the progress we made on Thursday after 1/2 day using a rented Bobcat skid-steer (which actually was a wheeled bobcat) for the gravel and dirt backfill.  We used the plywood to slide the fill into the right place and not have to manhandle it much after that.  

A view from the end on Thursday - there's still a lot to get done.

Your's truly setting block - once the block is set there are two glass reinforced plastic pins that interlock it with the blocks below.  The bond is the overlap between the blocks, in this case a 1/2 bond.

No, this isn't a staged shot, I did actually move dirt, gravel, and some block around with that bobcat.  Indeed it's fun but it really did expedite the work.  On Monday I alsomoved the crush-and-run around inside the garage walls as the initial rains from Lee were falling.  Plan was to have the tamper here on Tuesday to compact it but the rain made that impossible.  

This is the wall as of Tuesday Morning.  My brother-in-law Jesse helped on Saturday and Sunday (and yes, he did get to play with the Bobcat!). Jack came back on Labor Day to expertly run the bobcat and help wrestle blocks into place in preparation for the pending arrival of Lee.  About noon it started raining so we called it a good day and left the wall like this - you can see this is the "after-Lee" condition which is remarkable dry.  If you look closely at the wall that part on top that looks "loose" is actually the cap blocks Jack and I moved there as the rain started on Labor Day.


This is our "intermittent creek" that turned into a raging torrent this morning - it's actually two creeks that meet and flow into the Rocky River from our property.

This shows a bit of the water flowing across the front of the house East-to-West.  Grading guys got it just right on this one.  We still had water at the house but that was coming off the roof and it continued to settle the backfill.

That brown streak in front of the silt fence is the water running off the lot - to the right of this the water actually crested the silt fence due to the massive amount of rain coming down quickly.


This is a view from the back window looking at the water flowing down to the creek - the two silt fences did their job in large part but again, so much rain was falling the water actually climbed over the lower fence at this point.

This in interesting view - the water to the right is coming from Jack's property and it is clear.  The water straight ahead is coming from another property behind our house.  The two meet at this point and flow out to the left in this picture.  This picture is later in the day during one of our sunny spells.

I have to add a sincere thanks to both Jack, Jesse and Kevin for their help in building this wall.  I'm pretty sure that without their help I'd still be looking at a whole bunch of pallets of block wondering how I was going to make it all happen.  Renting that Bobcat was a great thing - we got it Thursday after lunch and they picked it up Tuesday morning.  We only paid for 1 1/2 days of rental but used it for the weekend and we moved yards of earth and about 1 1/2 loads of '78' gravel.  All in all we cleared 14 pallets of standard block and 2 of cap block.  I think that means something over 35,000 pounds of block got moved due to great friends and their invaluable help.  Jack's construction experience came in handy on a number of occasions as well!

Oh yeah, the raccoon was back in his comfy and dry house this weekend.  During clean-up this weekend Dee found the rascal sleeping comfortable behind the burlap hung to stay dry in the basement. We took that burlap down and today he was nowhere to be found so we think maybe he left on his on volition.