Monday and Tuesday the hangers put up all the drywall and boy did they leave a mess behind (as expected - sorry, no pictures of that). A cleanup crew showed up early on Wednesday and picked up the piles of discards (small pieces of sheet rock and paper tape). I did manage to scavenge some of the larger pieces of scrap to use to cover up the blown cellulose in the basement so we don't knock if off.
The clean-up then swept up the place pretty well so the guys on their stilts had nothing in their way while they were taping and mudding. Thursday brought the finishing crew - the taping and mudding of the joints, corners and any place where the drywall paper wasn't perfectly smooth. Not much else going on in the house while the crew was working but we did discover a small leak where the range hood vent went through the roof. The roofer showed up on Friday and determined that the cover installed by the HVAC crew was leaking There was no leak prior to the roofers installing the roof so it's possible the plastic either was cracked or the seal broken when the roofing was installed. Regardless, the roofer is returning on Monday to fashion a new vent cover from roofing metal.
The mud and taping crew worked for 3 days (yep, including Saturday until about 2:30) getting most of the joints taped and mudded. They didn't attack the tougher 45 degree angles where the sloped roof meets the walls. Propane heaters are used to help dry the humidity out of the air - today when we visited the site there were still damp spots on the mud so we fired up a couple of the heaters and it quickly got unbearable - temps got to about 78 and humidity had to be in the 80-90 percent range.
One thing DeeDee did notice was that several of the outlets were covered with sheetrock and not opened up. Fortunately she took pictures so we could identify the general location. This will save the electricians from having to search for and uncover the outlets at top-out.
 |
| Here's the soundproofing added to the master bedroom wall - blown cellulose not only insulates but is a good sound barrier as well. |
 |
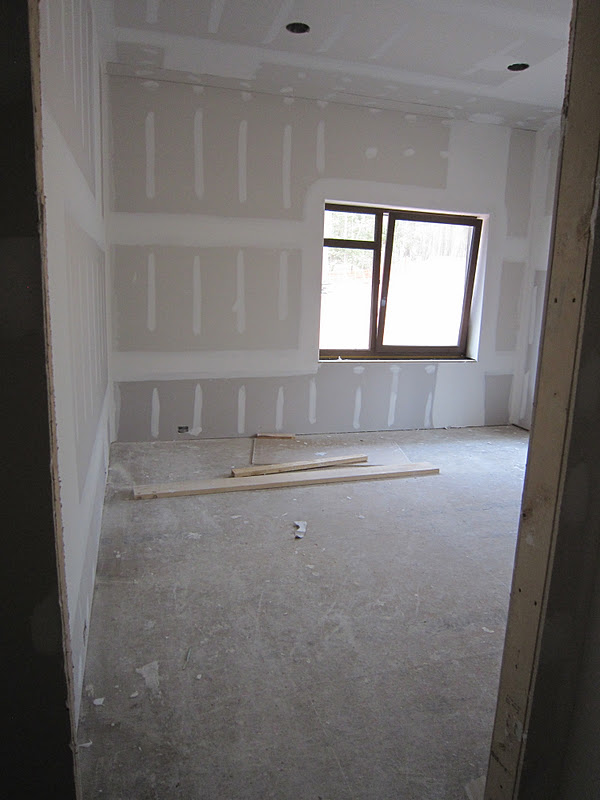
| Stacked sheetrock at the master bedroom door awaiting installation. |
 |
| That's the "repair team" on the roof troubleshooting the slight water leak (heavy rains on Thursday uncovered a leaky vent). |
 |
| Kevin and Freddy hard at work. Later in the process Freddy dumped a 5 gallon bucket of water while I was inside the crawl space watching for the leak. |
 |
| View of the family room from the kitchen end - note the light hitting the wall from the celerestory. A very good thing given the clerestory is on the North side of the house. |
 |
| Another view of the family room from the kitchen. |
 |
| The clerestory wall - that niche to the right will be where the informal dining table will sit. |
 |
| Viewing the kitchen from the family room. |
 |
| Looking down the hallway |
 |
| Yep, that vent stack is not straight but it's not attached to the wall at this point. |
 |
| The dining room entrance - those are pantries on either side and niches above each of the pantry doors. |
 |
| Looking down the hall - the beams will be exposed (that plastic was to protect the beams from spray foam damage. |
 |
| Unfortunately the scaffold obstructed the view from the front door but you can see the skylight bringing light in. |
 |
| The living room door with the transom cutouts. |
 |
| Living room as viewed from the door |
 |
| Standing under the skylight and looking out the stairwell window. Those blue buckets have the Camellia trees that we'll be planting in the future. |
 |
| Looking towards the family room/kitchen from the hallway (and yes, that's the skylight) |
 |
| Looking down the hallway - you can see the niche at the end. |
 |
| Hallway bathroom - that sun tunnel isn't complete yet but it is sure adding a lot of light. |
 |
| Looking into the work room from the hallway. |
 |
| Another view of the work room |
 |
| The closet in the work room |
 |
| Looking to the east, that's the retaining wall out the window with a few plants there to protect them from the "Crazy squirrel" that's been eating them at the rental property. |
 |
| Looking back down the hall towards the family room. Master bedroom door on the left with the transom allowing more light into the hallway. |
 |
| The master bedroom - the thicker top of the window holds that "roladen" roller shade. |
 |
| Master bedroom doorway view |
 |
| Left hand walk-in closet; two pair of the stilts there on the left (and no, I didn't venture to try them out for fear I'd fall and break my keister) |
 |
| Right hand walk-in closet |
 |
| Master bath with the 'custom' construction cover over it to protect it from falling debris and people walking in it while working around it. |
 |
| Looking at the bath so you can see the view from the tub will be spectacular |
 |
| The toilet will be there on the left, shower stall on the right will have plexiglass or similar clear cover and steam curb to prevent condensation from going directly into the ERV return. |
 |
| Basement hallway |
 |
| Office as viewed from the hallway. |
 |
| Another view of the office - the boxes high on the wall are for the TV connection. |
 |
| The workout room -and more TV connections on the wall |
 |
| South wall of the workout room |
 |
| East wall of the workout room - closet to the left and the tilt/turn window-door ahead |
 |
| Spare bedroom - note the large portion of the window opens which is due to the egress requirements (or ingress of firefighters in their gear) |
 |
| The view from the spare bedroom will be the retaining wall and the forest over the top of it. |
 |
| The downstairs bathroom - that small opening to the left is the linen closet which shrunk over the build due to the requirement for HVAC ducting from the mechanical room to the upstairs |
 |
| The reverse view of the basement bathroom - that chase over the door is another design mod to get HVAC across to the spare bedroom and workout room |
 |
| Viewing the downstairs hallway from the East end. |
We poured the footings for the deck on Monday so we can now move forward on installing the permanent support posts (all 13 of them). Once those are installed we'll get the decking material and cable rail and finish off the deck.
Thursday we picked up the cork for the downstairs at the Pro Source warehouse and tile/grout/caulk at the manufacturers warehouses. Unfortunately we discovered that one of the boxes of 12x24 tiles had significant damage so we'll have to deal with that this week - the tile is from Italy so we are hoping it is in stock and doesn't have to be ordered. That will also mean the dye lots might change so there could be a difference in coloration. The cork is Lisboa (Lisbon) from Natural Cork and is a click-fit so you simply cut the planks to the right size and snap them together (after setting the underlayment material down). This will cover all the floors in the spare bedroom, office, workout room and hallway in the basement. We have installed and lived with cork before and this particular manufacturer uses an aluminum oxide coating that is very durable and stain/scratch resistant.
Our next steps are to install the flooring and then cabinets and trim. The cabinetmaker has finished all the doors and drawers and will begin the boxes this week. We selected the Marmoleum flooring for the bathrooms and the laundry room today so the week after the holiday we hope to have the maple installed.