Another long span between posts but not because nothing has been happening. We had the trim carpenters setting baseboards upstairs but they wanted us to put down the Natural Cork floating floor in the basement before they could set the baseboard there. We spent several days leveling the concrete by grinding down high spots and using self-leveling compound (which isn't 100% self-leveling) for low spots. We used a long straightedge to check for flatness - level was a secondary goal because the manufacturer's spec says 1/8" variation in 10' is acceptable. Knowing that level would mean more grinding and filling we opted for "flat" - which in actuality was not far from level in most cases. After getting that done, we laid the cork room by room with transitions between each room, closet and the hallway. The first room was the "learning" room where we found the right spacers to use (short 1/2" blocks of wood placed under the sheetrock in a way we could get them out later). The process involves setting the first row of planks (tongues cut off) against the spacers and then fitting the next row to it. You place the first plank such that the joint is not quite "clicked" and then use a tapping block and mallet to set the joint. Once that plank is down the next one is placed about 1/8" from that one in the same manner, the long edge joint set, and then you set the short edge joint. We found that this worked well as a two-person job with one doing the "tapping" while the second applied pressure to the joint and watched for the "click' to happen. It took about 4 to 5 "whacks" with the mallet to set the joint, again using the tapping block. I used a piece of scrap marmoleum to protect the underlayment from getting beat up by the hammer and tapping block.
You have to start each row with at least a 10" spacing between the joints in adjacent rows (which carries through in all successive joints in that row). When you get to the end, you may have a small sliver left but it doesn't matter since it's the end of the row.
After crossing the room like this we used a pull-bar designed for laminate floors to set the joints. To protect the surface of the planks from the pull bar and mallet, I used the same piece of scrap marmoleum as a guard.
The hard part of this installation was the doorways since the jambs and trim were installed we had to cut the planks to shape and slide them under the wood. Several attempts were needed in a couple cases because the undercut and my puzzle-pieces didn't match so we'd have to pull it out and recut. We allowed the required 1/2" spacing at each wall and on each side of the transition strips at all doorways.
My next challenge was finding transition strips that met the requirement. We tried a few different variants from Lowe's and Home Depot to no avail since they were all too shallow to accommodate the thickness of the cork and underlayment. My next plan was to fabricate transition strips from red oak (when a clear Minwax poly was applied they matched the floor quite well). Unfortunately the home improvement stores only carry 1" stock which is actually 3/4" finished thickness. Again not quite enough for the cork. We picked up a couple of 10' lengths of 5/4 x 6 red oak from the Hardwood Store of NC and I used the table saw and miter saw to cut rabbits and notches to fit each door. Since each door was a slight bit different this actually worked out well. There was a cased opening (cork to cork), 4 standard doors (cork to cork), one standard door (cork to marmoleum) and 3 standard doors (cork to concrete) so I needed "L" and "T" profiles. Each was a bit unique in shape so it took a bit of time to make them fit the door jamb/molding. Remember, no shoe molding in this application so it has to be a good fit the first shot!
After we got the flooring installed downstairs the trim carpenters returned and finish installing the last of the doors and trim. All told it took about 4 days (2 with 4 guys and 2 with 3) to get the trim installed. The hardest part for them was the variations in the floor as well as the baseboard outlets. The variations in the floor were handled by scribing and cutting the bottom to match. There are a couple unique situations in the house that caused the trim guys headaches but they worked magic. The transom windows look awesome and these guys really do like wood - in the case of the door from the master bedroom to the master bath they actually matched the "curtain effect" of the door stiles with trim that looks amazingly like curtains that continue from the door into the trim.
 |
| Viewing from the other direction - basement hall with cork installed. |
 |
| Workout room - we removed the doors due to clearance issues. Trim carpenters cut them down on their next visit. |
 |
| workout room with the flooring and sill complete |
 |
| Basement hallway after flooring cork was installed.(yeah, we discovered the lights had been connected by the electricians as well!) |
 |
| transition between spare bedroom and hallway |
 |
| Alder risers, maple tread and wall cap (to match flooring - still need stain/poly finish) and poplar skirt board |
I also installed the last vanity cabinet and made sure it was level so the granite install would go smoothly.
 |
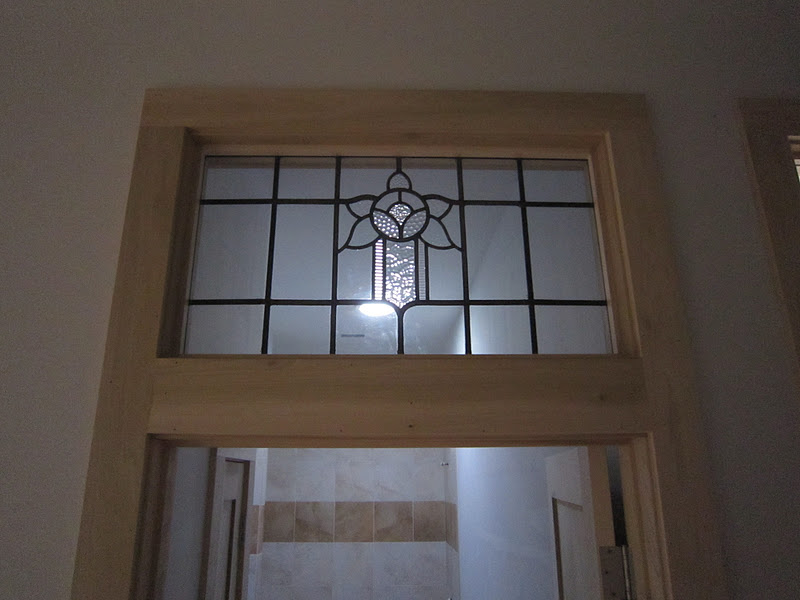
| Quilting room and hall bath doors/transoms - that's the niche on the wall that's planned to hold some stained glass. |
 |
| The "curtain door" - that door came from the manufacturer with those darker corners and the trim carpenters matched it! Phenomenal work. |
 |
The window sill in the family roo |
Friday the sheetrock guys returned to point up the walls in prep for painting. We had a couple outlets to move so that was a last-minute scramble (in addition to the stairwell lights Kevin graciously moved earlier in the week).
Also on Friday the granite folks arrived with the bathroom granite and quartz. They finished the two hall bathrooms and then moved on to the master bath. The tub surround was a bit challenging due to the shape of the tub and the location of the walls. Finally we decided it would be easier to remove the tub from the surround and provide them ready access to the deck. That helped but it took longer than they anticipated to get the install done right. The surround was pieced with two large pieces and two small pieces forming the oval. The layout we did a week ago Sunday worked very well with the pattern of the pieces matching very well. The one thing we found out was the slab didn't yield enough material for all the backsplashes on the tub and vanities so the fabricator had to order another slab - he is honoring his quoted price so that additional slab is not on our bill. I didn't get any pictures taken before things got covered up so we'll get those as soon as possible.
 |
| Templating the slab - bath surround is upper and lower right and left - vanities are the squares in the middle. smaller pieces are the wall cap and shower sill. Temp was about 40 degrees and windy this day so duct tape helped keep the templates in place. |
The weekend was spent sanding all the trim wood in preparation for the finishes. We did not get to look at the samples for stain on Friday so today we did have a sample that was intended to be similar in tone but darker than the cherry of the kitchen cabinets. The samples we got back were not what we hoped they would be - they were too light and also didn't cover the wood evenly. We saw what people meant when they say "blotchy" so we fell back and regrouped. We switched from a Sherwin Williams stain to looking at EarthPaint which while more expensive per gallon it's less expensive to apply since it's a two coat and done application. The stain would require conditioner application, a coat of stain, sanding, and then two coats of clear polyurethane. Tomorrow we'll get to see samples of our poplar stained with the "Acorn" color which is a darker red/brown than we saw today.
Another interesting discovery this weekend was the browning of the poplar starts early. Two window sills had scraps of poplar laying in them for a few days and under the wood stayed "white" while the wood exposed to sunlight browned up a slight bit.
Today the painters began their preparations for stain and paint by taping off all the windows and doors, cabinets, and anything else that needed protection. They also started covering the floor with contractor paper to protect it from any dripping finishes or overspray. Once we have selected a color for the stain they'll start with that - it's easier to paint over stain on the walls than it is to stain over any paint on the wood trim.
Last week we also got the gutters installed - they're an amazing match in that you have to look carefully to see they're not just an extension of the roof. The only giveaway is the downspout and rainchains hanging from the eaves. I placed rain barrels under the chains on Thursday and when the rain started on Friday they had filled completely within two hours and were overflowing onto the ground. Saturday morning I dumped the water (they were old pickle barrels that reeked of vinegar) and they filled again with the rains on Saturday. We essentially collected over 360 gallons of water in less than 24 hours. Friday also had the grading company out for an estimate of the drainage system requirements and final grading for the property. We're going to avoid as many catch-basins and connections in the drainage pipe as possible. Right now we're looking at a couple of catch basins in the front to channel water away from the house and septic fields. The Northeast corner will drain to the ravine at the east edge of the property while the basin in front of the garage willbe routed around the west side of the house and daylight at the edge of the riprap to drain down into the intermittent stream (that has been nearly continuous for a couple of months now).
 |
| Can you see the gutters here? No fair looking for the rain chain and downspouts! |
 |
| Ok, here you can see the rain chain clearly. Our plan is for an overflow under this rain barrel to flow into the catch basin that will be situated about where that water is pooling in the bottom center of the picture. |
 |
| Downspout on the Northeast corner |
 |
| Two of the pickle-barrels turned rain barrels - we got these for $10 at a local 'recycling' point where they take the barrels and resell them to prevent them from entering landfill. $15 if you wan them washed but a couple times filling and dumping out rainwater has rid them of the vinegar and spice smells. |
 |
| Rainchain on the back of the deck. |
 |
| If you look closely you can see the downspouts at the middle and far end of the house. The below video shows a snippet of the rain chain in action - taken with my smartphone so it's not the best. The sound is the water hitting the rain barrel which is about 4' below the rain chain at this point. |