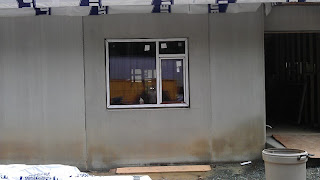
After the first couple we figured out the secret to making the glazing removal go more quickly but then we hit the larger "egress" openings. Those windows use a different hardware that is stronger to carry the heavier weight of the window. We didn't have the installation pamphlet since I forgot it on the kitchen table when I left home this morning. A call to Armin didn't really help since we were not sure what model the hardware is. Once the pamplet arrived it proved little good since none of us could translate German and the pictures were not that clear.
We did manage to figure out the process on removing the first window and then moved to the next couple which got progressively easier. It still wasn't entirely obvious what combination of handle position and window manipulations was exactly the right one but we got through it.
We got well ahead of the framers with removing the glass and decided to start putting the glazing back into the windows already mounted. One "secret" was to use latex/silicone caulking to hold the plastic shims in place while setting the glazed units back into the frames. Putting the removable vinyl strips back in wasn't too difficult but you had to be willing to use some pressure to seat it well.
Reinstalling the "heavy window" sashes into the frames was more complicated than we thought but after the third unit we figured out the right handle position and managed not to spend too long having Kevin and Nick hoist the heavy window while I fumbled with the hinges.
It is pretty amazing how much the look of the house changes once you get the windows in - they add color and texture that was otherwise lacking.
Here's the formal living room window installed with the glazing back in. We haven't removed the white protective tape yet but it does provide a good idea of the unique structure of the windows.
 |
| Here's the upstairs front bedroom with most of the protective film removed - you can see the color of the windows well here. |
 |
| The front of the house showing the installed living room and dining room windows. |
 |
| This is the banana that Jesse forgot to take with him after his visit today (around lunch time). He refused the $1M ransom I demanded for ti's safe return - but he got it back safe and sound anyway! |
All in all a good day - some challenges at the start of the day as we figured out how best to remove the glazing and operable sections of the windows. I think I can say we all went home tired and ready for a good nights sleep. Tomorrow will be a day of rest for the window install which is probably best since we are expecting copious amounts of rain in the next 24 hours. We had to call Armin a number of times today for advice on sash removal, hinge mechanisms, and general information on how to install these windows successfully. He was a great help and will return to the site on Monday to help us with the "big" windows, doors and multi-piece units that aren't like the others we have already "mastered."
One big lesson we all learned from this was not to plan on unloading two house-loads of windows on the same day as you do the initial training session. It may have been easier had the truck not had to make a 4 1/2 hour drive to the first site and then home again after the training session. The other recommendation would be to have the trainers install one window start to finish and then oversee the framers as they installed their first window; that may have sped up the first few installations. We haven't yet taped/foamed/glued the bottom inside and outside of he windows but plan to do that in an assembly line fashion so we get the system down and do it quickly and when the humidity isn't so high you have condensation pools forming on the concrete slab in the basement.

No comments:
Post a Comment